joplin-vscode-plugin
Overview
joplin-vscode-plugin offers editing and management of Joplin notes with the power and flexibility of VSCode.
Joplin Web Clipper is designed to communicate with browser extensions by sharing Notes, Notebooks, Tags, etc. through a REST web API. joplin-vscode-plugin connects to that same REST endpoint to freely make changes to your notes without ever leaving the editor.
Why does this plugin exist? Read my motivation for developing it.
What can it do? The roadmap lists both existing and planned features.
Never heard of Joplin? You're missing out on a great opensource synchronized note taking app.
Requirements
- Joplin version > v1.4.19
- VSCode version > v1.45.0
- Joplin Web Clipper enabled
- Basic familiarity with using both Joplin and VS Code
Install Joplin VSCode plugin
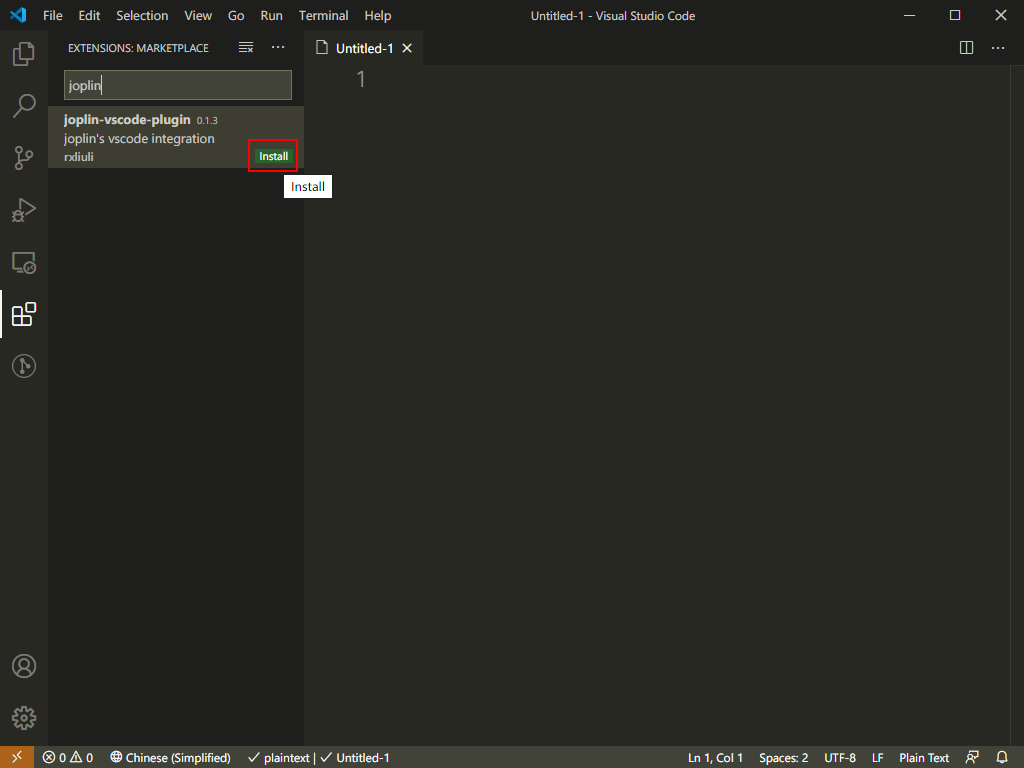
Search for "Joplin" in the VSCode Marketplace. Find "joplin-vscode-plugin" and click Install.

Configure
To access the Joplin database, we need a connection to the API endpoint opened by Joplin Web Clipper. That means Joplin must be running and Web Clipper must be enabled.
For help with Web Clipper refer to: Joplin Web Clipper.
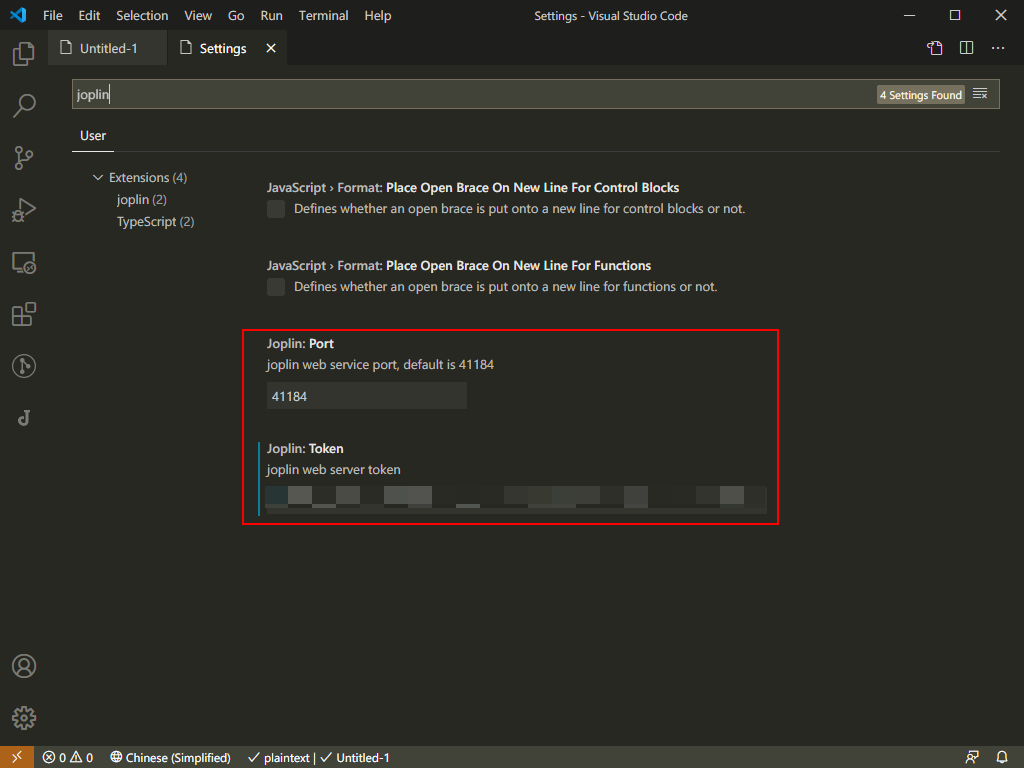
Three settings need attention to get up and running.
Port
- Copy the port number from Joplin settings and paste it here. The active port displays when Web Clipper is enabled:
Web Clipper -> Step 1: Enable the clipper service -> Status
Token
- Copy your Authorization token from Joplin settings and paste it here:
Web Clipper -> Advanced options -> Authorization Token
Program Profile Path
This setting is required if you wish to use attachment-related features.
In general, if you are using a portable application, it should be the . /JoplinProfile directory, in which you should see the resources, templates, and tmp directories.

Restart VSCode
Currently configuration edits do not trigger a fresh connection. Simply close VSCode and it should connect to Joplin the next time you start.
Say Hello Joplin
Type the key chord Ctrl+J Ctrl+J and celebrate. ![]() That hotkey combo activates the View: Show Joplin command, opening the Sidebar to reveal all your Notebooks.
That hotkey combo activates the View: Show Joplin command, opening the Sidebar to reveal all your Notebooks.
Usage
All your Notes and Noteboks can be found in the Sidebar. Unfold the Notebooks to see Subnotebooks and Notes beneath.
Click on a Note to open a working copy in the Editor. Save it to push changes back to Joplin.
You have full access to create, edit, and delete both Notes and Notebooks, at your whim. And it doesn't even stop there. The power is yours now. ![]()
Tip: Explore the results of typing "joplin" in the Command Palette to find out what great features I didn't tell you about.
Commands and keybindings
VSCode has a lot of keybindings. To avoid constantly clashing with all the built in settings, we laid claim to just one desirable hotekey, Ctrl+J, and turned that into the trigger for a key chord.
Claiming Ctrl+J displaced the native binding for
workbench.action.togglePanel(View: Toggle Panel). For your convenience a sane replacement binding is already added at Ctrl+K Ctrl+J.
Type Joplin into the Command Palette (Ctrl+P) to see all the new commands available to you. Some of them already have keybindings. Assign new bindings under the Ctrl+J namespace to fit your needs.


